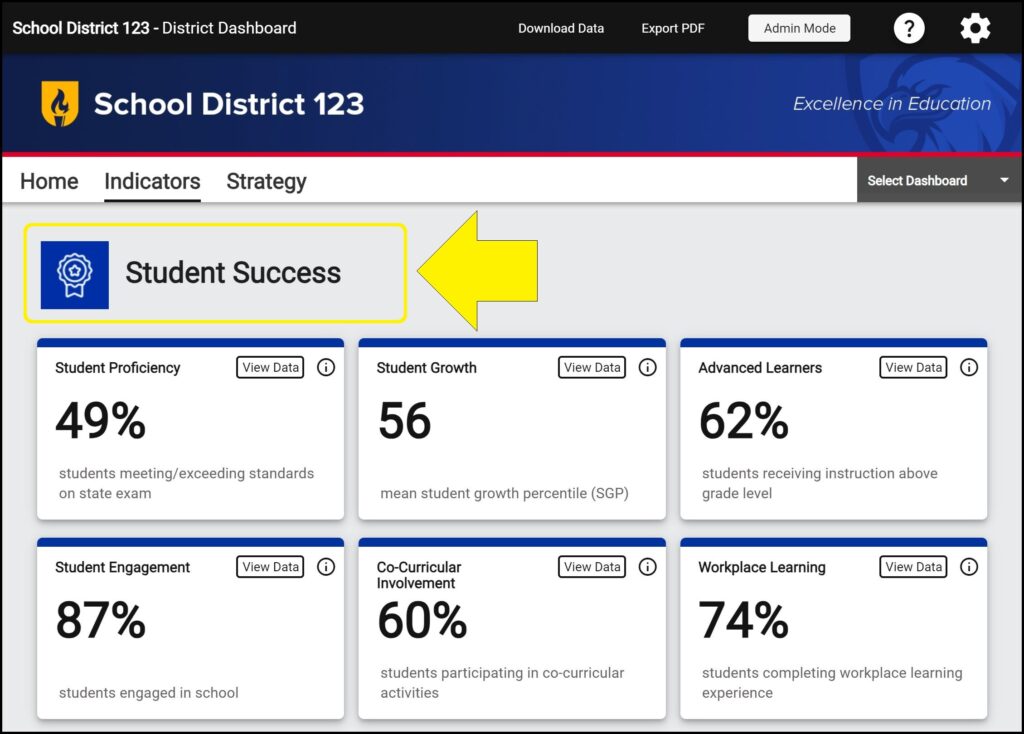
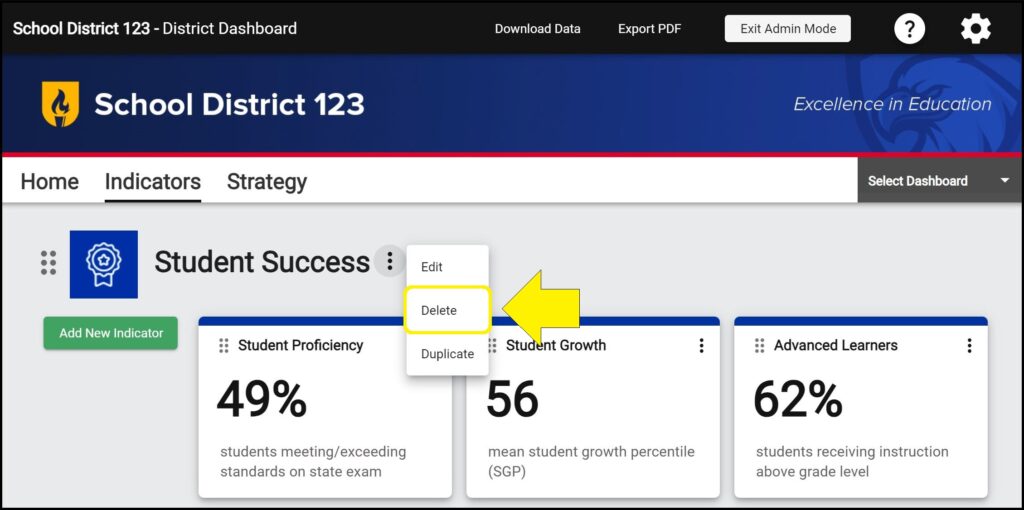
Indicator Groups contain Indicator Tiles, which in turn contain Indicator Charts.
Adding a new Indicator Group
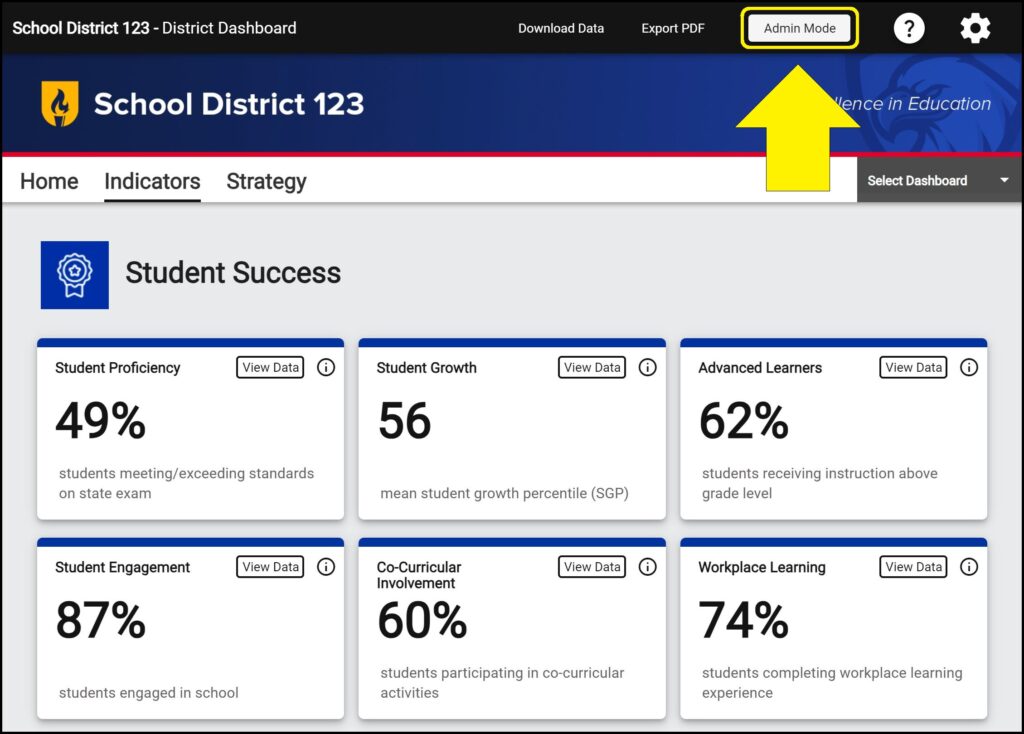
1. Enter Admin Mode on the Indicators page.
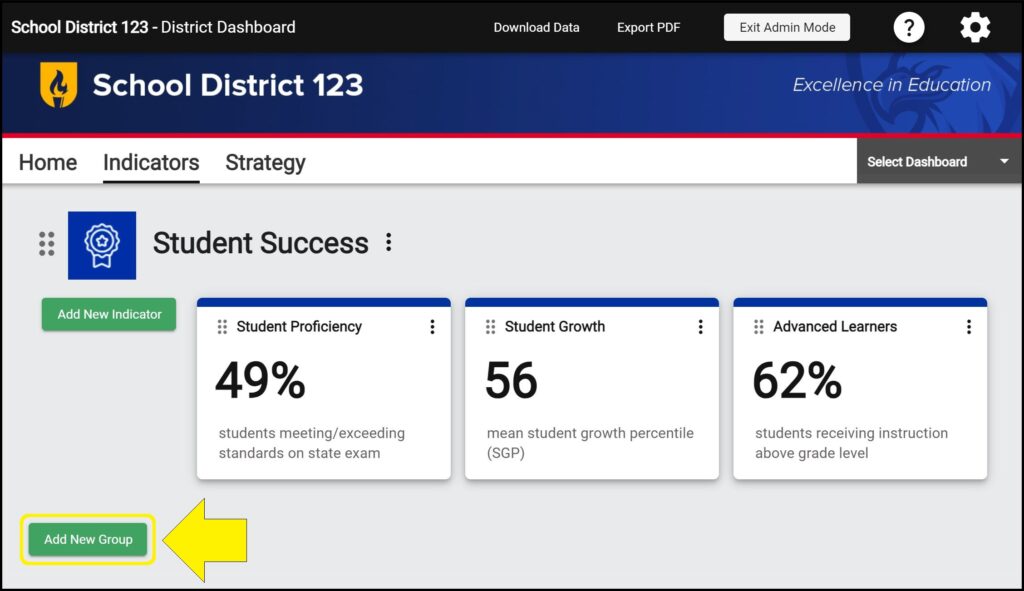
2. Click the green ‘Add New Group’ button.
Note: If multiple Indicator Groups and Indicator Tiles already exist, you may need to scroll down to the bottom of the page.
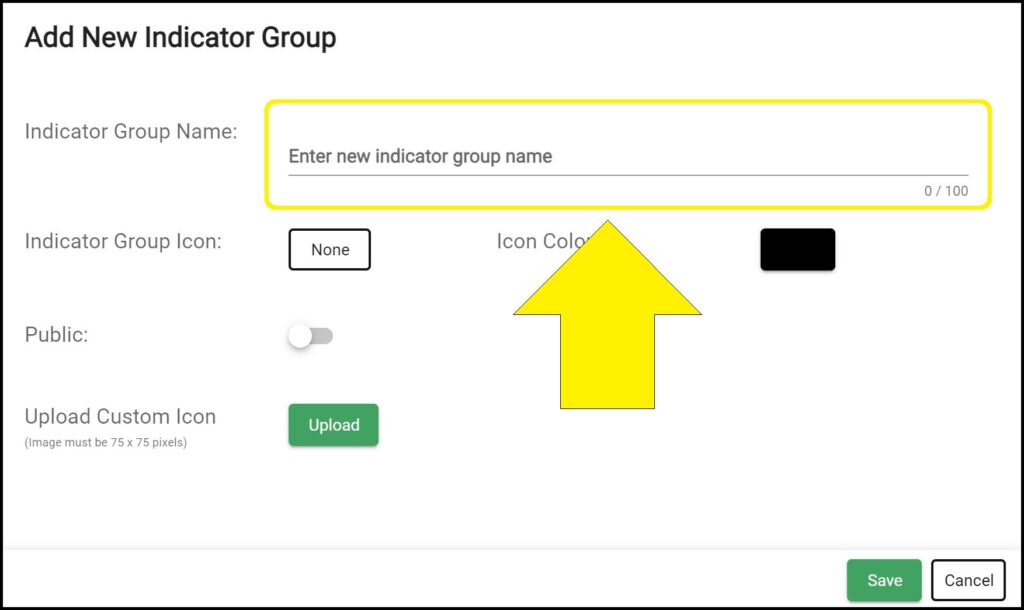
3. Enter a name for the new Indicator Group.
4. If desired, choose an icon to display next to the indicator group name. You can choose from the icons available in the dropdown menu, or you can upload your own custom icon. If you select an icon from the dropdown menu, you can also choose a color. (How to add an icon next to an Indicator Group name)
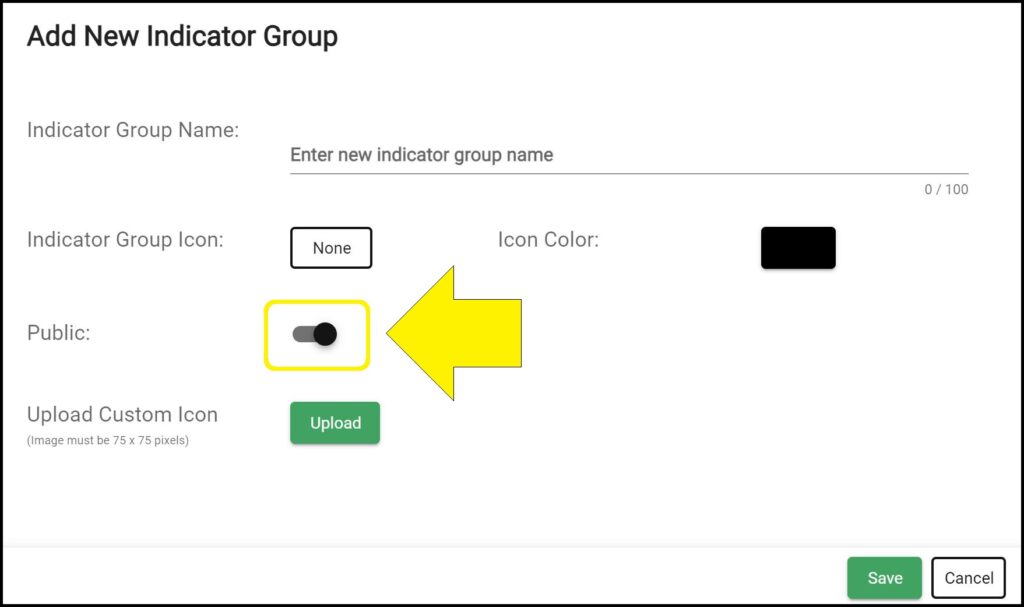
5. If you would like the Indicator Group to display on the dashboard’s public Indicators page, click the ‘Public’ toggle to switch the toggle to the right.
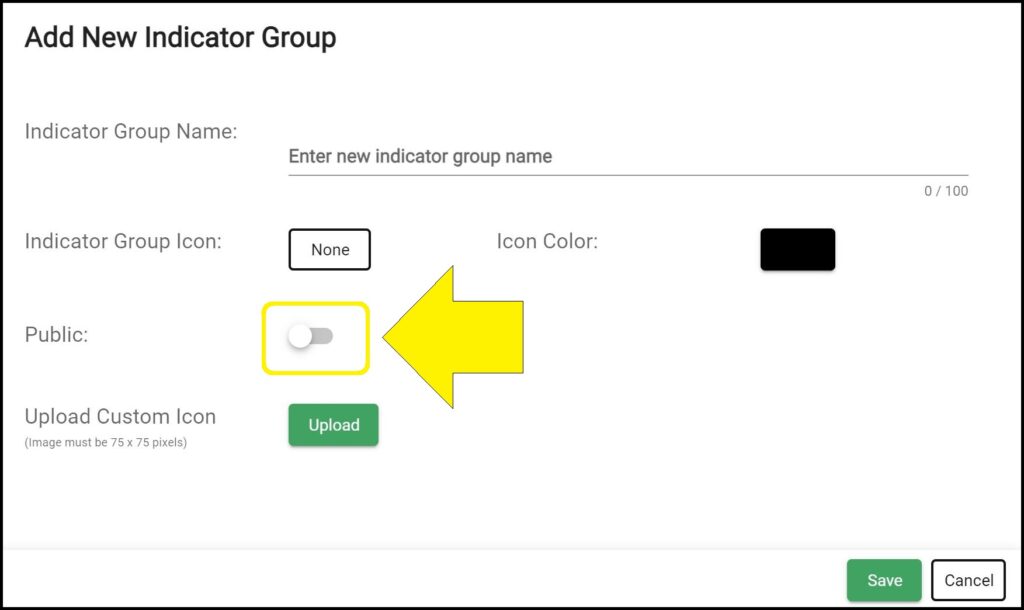
Click the ‘Public’ toggle to switch the toggle to the left to hide the Indicator Group and all the Indicator Tiles within the group from the dashboard’s public Indicators page.
Note: Even if each individual Indicator Tile within an Indicator Group has been made public and the Indicators page has also been made public, none of the Indicator Tiles within an Indicator Group will display on the dashboard’s public Indicators page if the ‘Public’ toggle is toggled to the left for the Indicator Group.
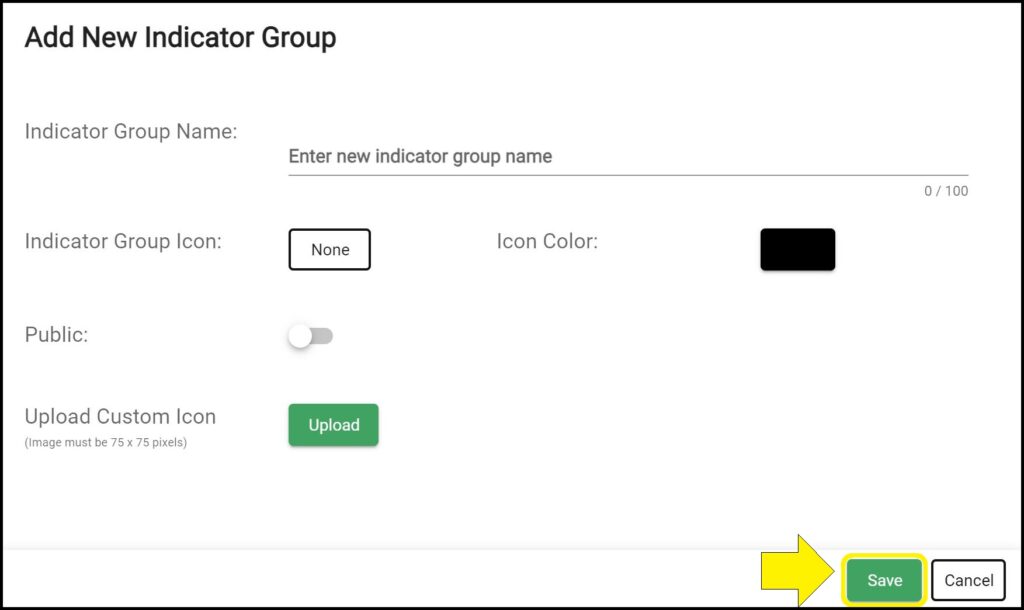
6. Click the green ‘Save’ button.
7. The new Indicator Group will appear below any previously existing Indicator Groups and Indicator Tiles.
Editing an existing Indicator Group
1. Enter Admin Mode on the Indicators page.
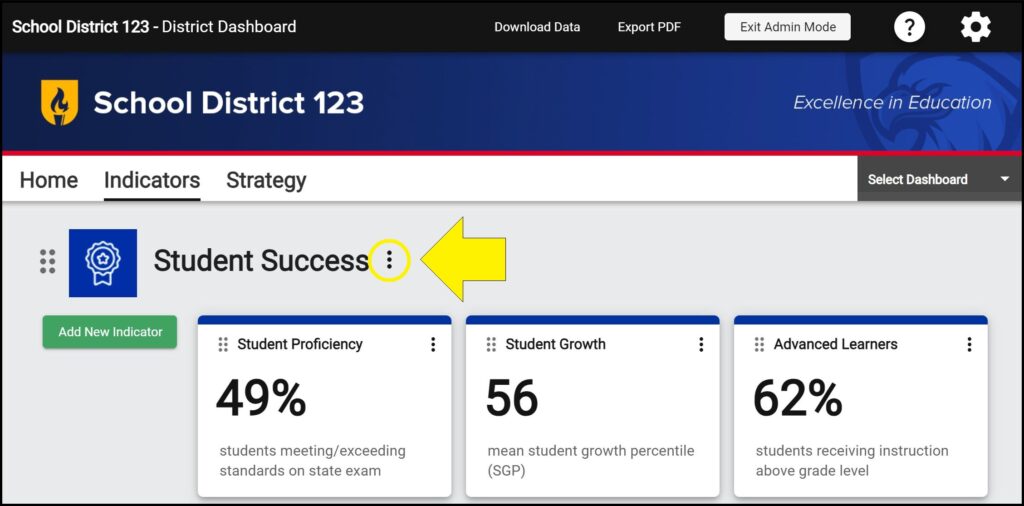
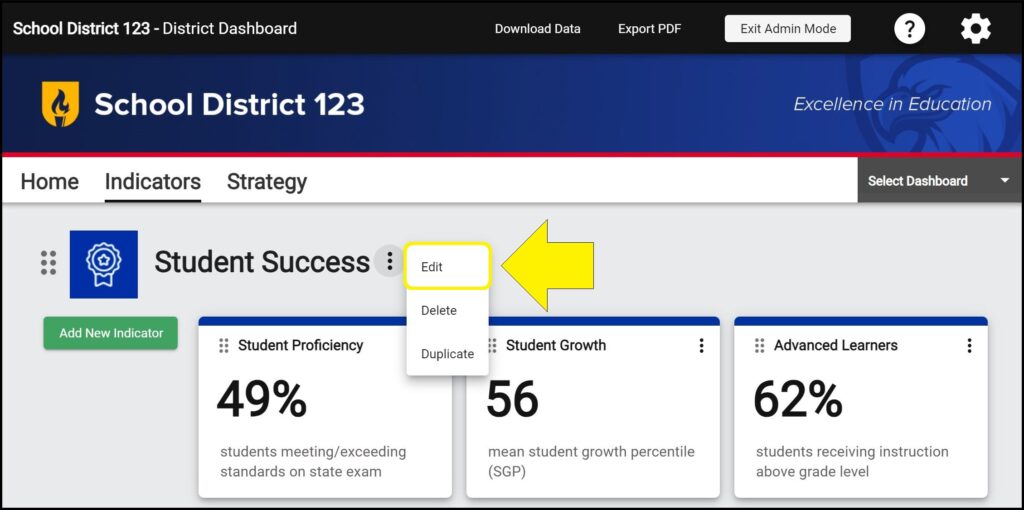
2. Click the ellipses (three vertical dots) to the right of the Indicator Group you wish to edit.
3. Select ‘Edit’ from the menu dropdown.
4. Edit the Indicator Group name, icon, and public/private status as desired. (How to change an Indicator Group icon)
5. Click the green ‘Save’ button.
Duplicating an existing Indicator Group
Indicator Groups can be duplicated within the same dashboard’s Indicators page or can be duplicated to another dashboard’s Indicators page within your district’s Strategic Dashboard. When an Indicator Group is duplicated, any existing Indicator Tiles and Indicator Charts within that Indicator Group will also be duplicated.
1. Enter Admin Mode on the Indicators page.
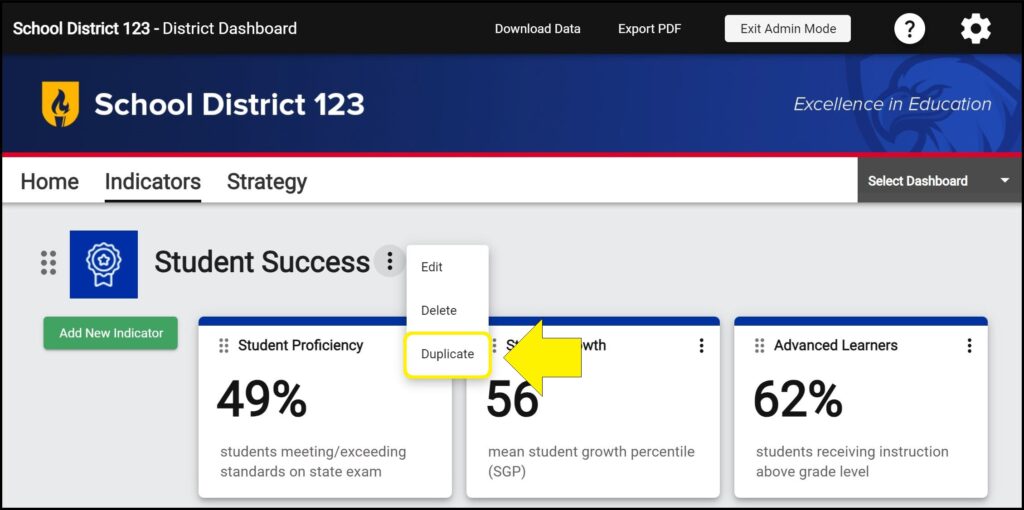
2. Click the ellipses (three vertical dots) to the right of the Indicator Group you wish to duplicate.
3. Select ‘Duplicate’ from the dropdown menu.
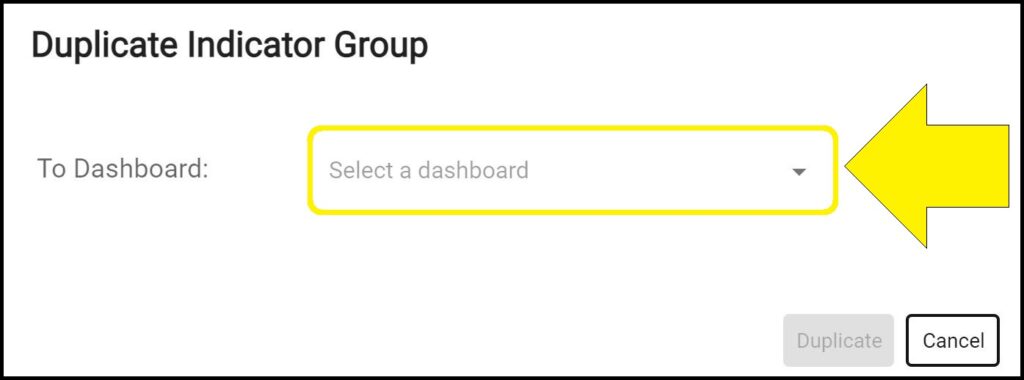
4. Select the dashboard you wish to be the destination for your duplicated Indicator Group.
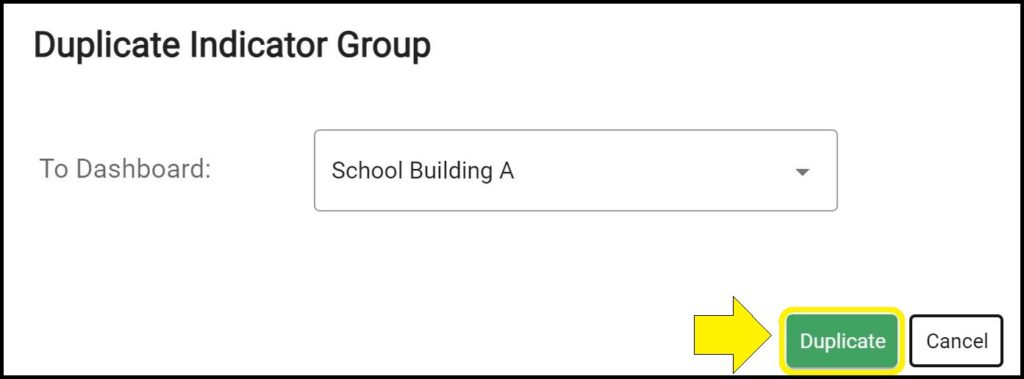
5. Click the green ‘Duplicate’ button.
6. Your duplicated Indicator Group will appear below all existing Indicator Groups on the selected dashboard Indicators page and the name of the duplicated Indicator Group will begin with “Copy of”.
Deleting an existing Indicator Group
Warning: Deleting Indicator Groups is permanent and cannot be undone. If an Indicator Group is deleted, all Indicator Tiles and Indicator Charts within that Indicator Group, as well as all information and data, will be permanently deleted and cannot be recovered.
1. Enter Admin Mode on the Indicators page.
2. Click the ellipses (three vertical dots) to the right of the Indicator Group you wish to delete.
3. Select ‘Delete’ from the menu dropdown.
4. Click the red ‘Delete’ button.
Issues adding, editing, duplicating, or deleting Indicator Groups on the Indicators page?
If you experience issues adding, editing, duplicating, or deleting Indicator Groups on a dashboard’s Indicators page, contact questions@ecragroup.com or submit a ticket for support.

