
Overview
This guide provides step-by-step instructions for exporting iReady scores from iReady Connect. Follow these instructions to ensure you retrieve and securely send the correct data to ECRA Group.
Instruction Guide
Step 1 – Logging In
– Log in to iReady Connect at login.i-ready.com.
Step 2 – Accessing the Diagnostic Results Export
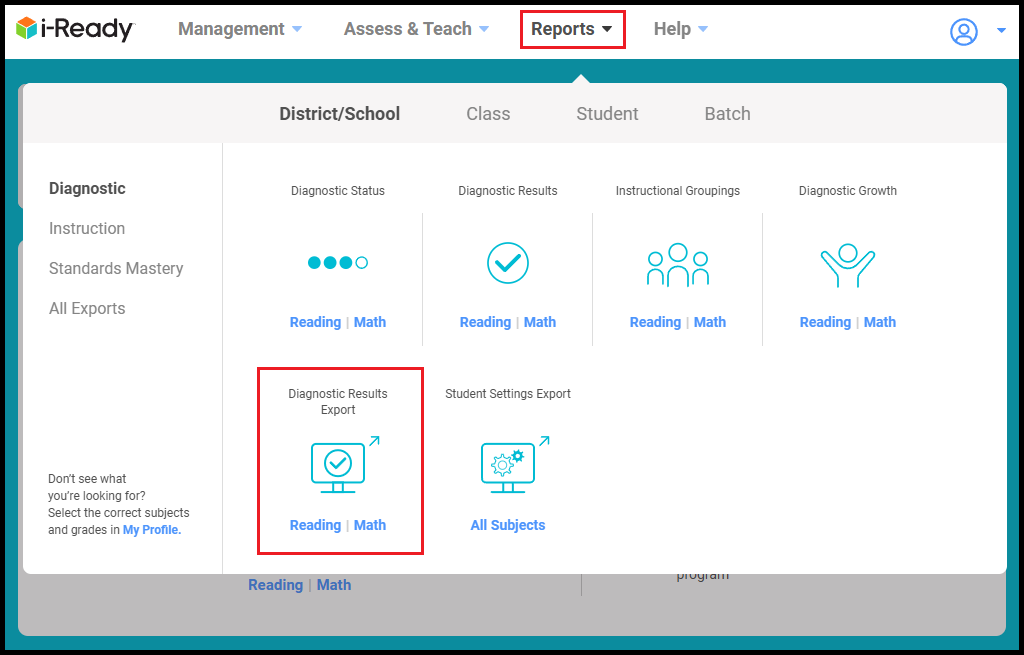
– Click Reports in the top menu bar.
– Under Diagnostic Results Export, click Reading or Math or another desired subject.
Step 3 – Creating an Export
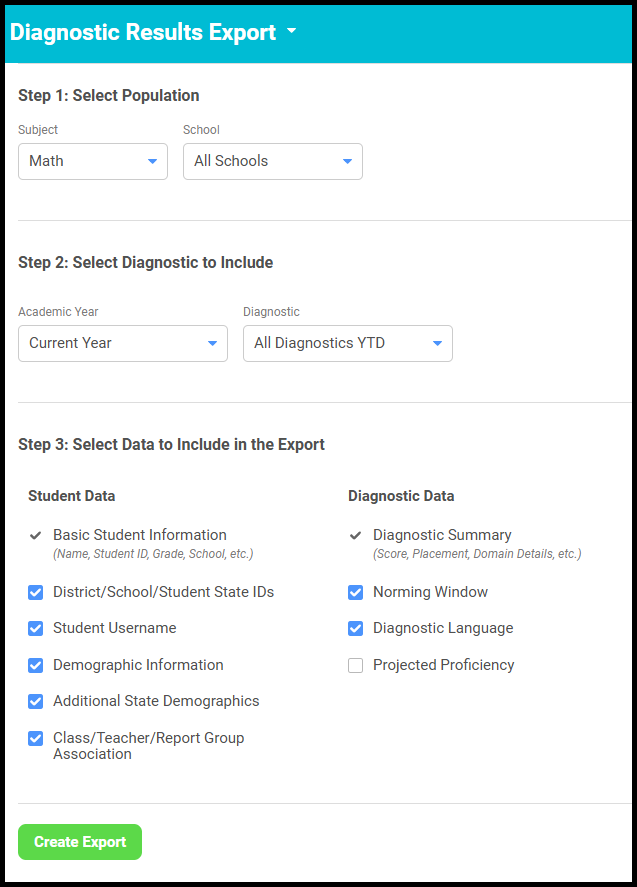
– Subject will default to the subject clicked in the previous step. Note that you will have to download each subject separately.
– School will default to All Schools, if available. If not available, select a school. Note that if All Schools is not available, you will have to download data for each school separately.
– Academic Year will default to the current school year. Select a different school year if desired.
– Diagnostic will default to All Diagnostics YTD, which will export data for all terms within a school year. Select a different diagnostic if desired.
– Keep all default selections in the Student Data and Diagnostic Data sections.
– Click Create Export in the bottom left corner.
Step 4 – Creating Additional Exports
– Repeat Step 3 and select a different subject and/or school.
– Continue repeating Step 3 until all desired exports have been created.
Step 5 – Accessing the Export Queue
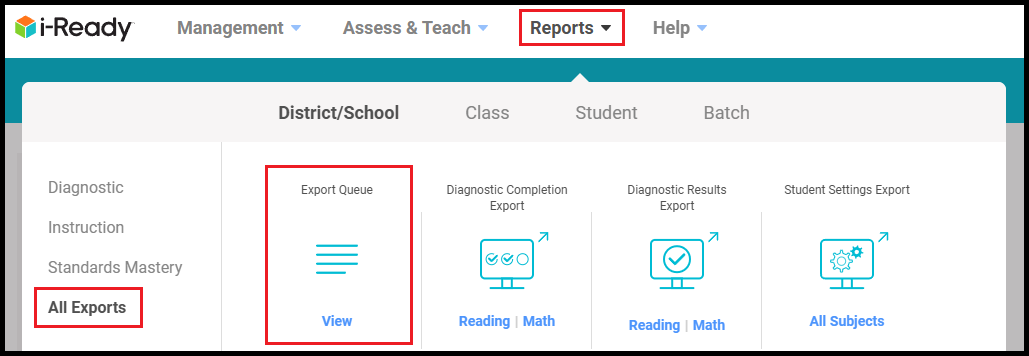
– Click Reports in the top menu bar.
– Click All Exports in the left sidebar.
– Under Export Queue, click View.
Step 6 – Downloading the Data
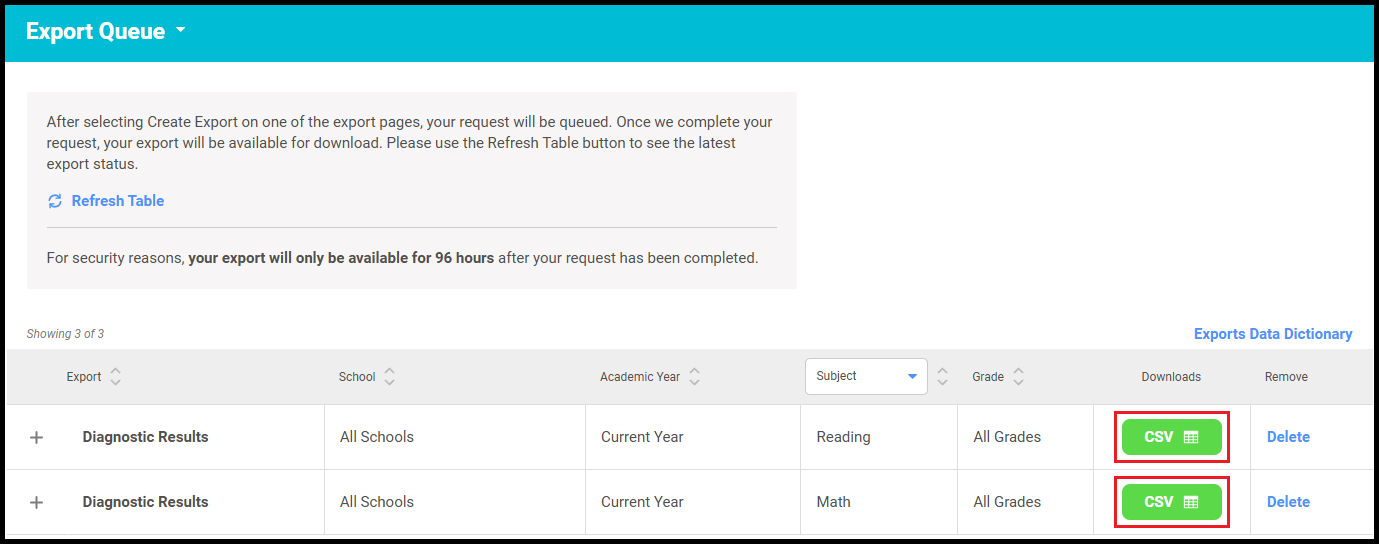
– Click the CSV button to the right of each requested file.
Step 7 – Sending Data to ECRA Group
– Rename each downloaded data file to include the following information before sending to ECRA:
– “iReady”
– Subject selected for download
– District name
– School year and term selected for download
– Send the downloaded data file(s) to ECRA using your district’s secure data transfer folder.
