
Overview
This guide provides step-by-step instructions for exporting FastBridge data from the FastBridge platform. Follow these instructions to ensure you retrieve and securely send the correct data to ECRA Group.
Instruction Guide
Step 1 – Logging In
– Log in to FastBridge at auth.fastbridge.org/login -OR- your district’s designated Renaissance login page.
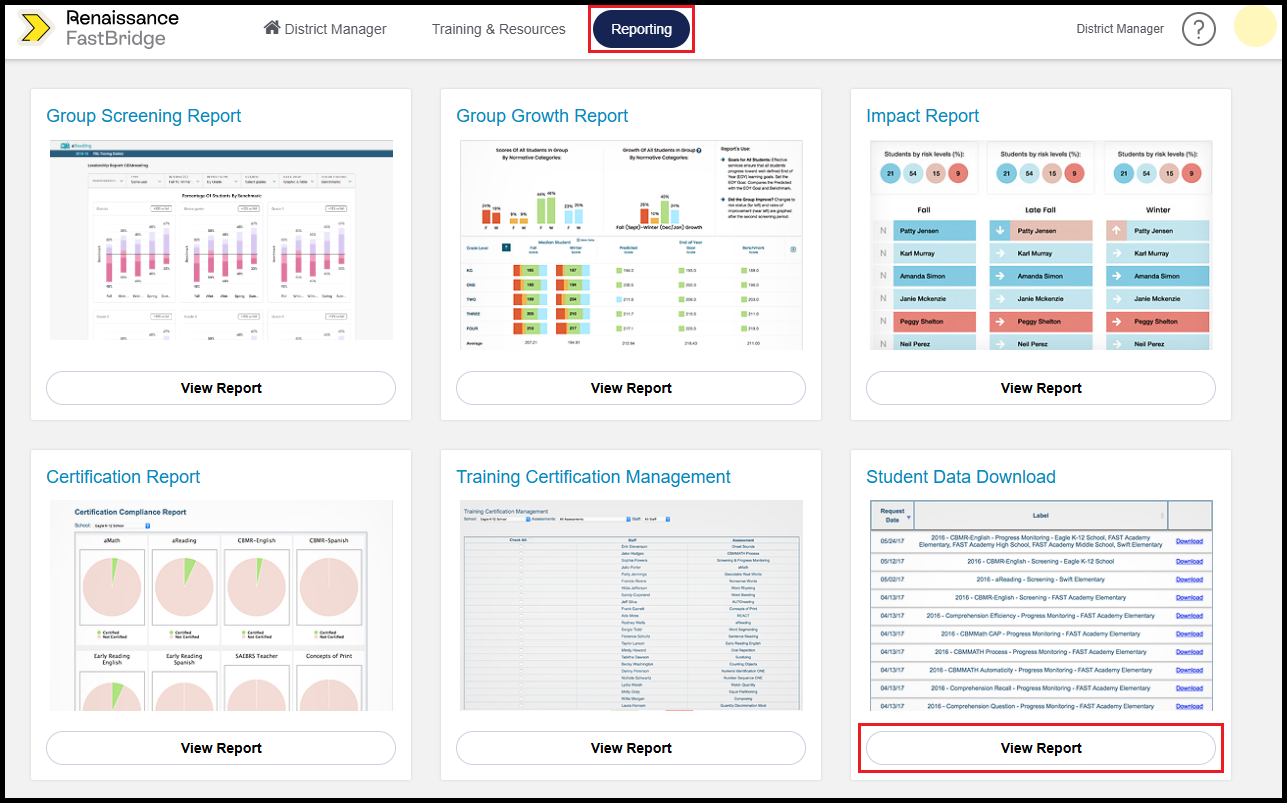
Step 2 – Accessing the Student Data Download
– Click Reporting in the menu bar at the top of the page.
– Under Student Data Download, click View Report.
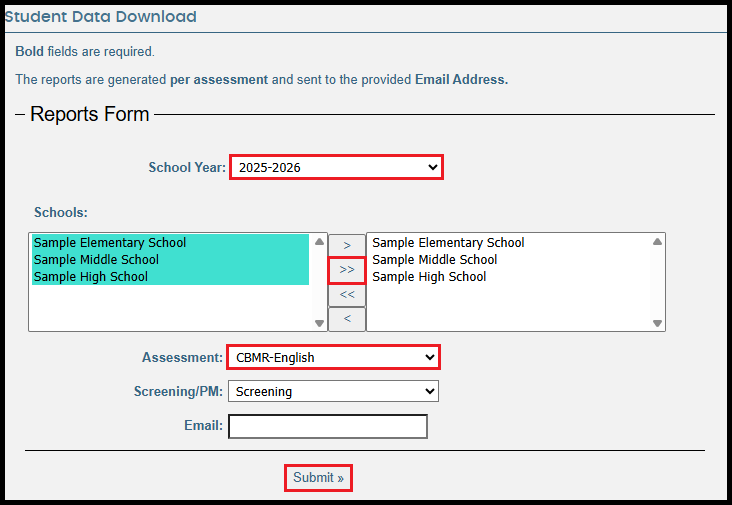
Step 3 – Submitting the Reports Form
– School Year: Select the desired school year from the dropdown menu.
– Schools: Click the >> button to move all schools over to the box to the right.
– Assessment: Select an assessment from the dropdown menu. Note that you can only select one assessment at a time.
– Click Submit.
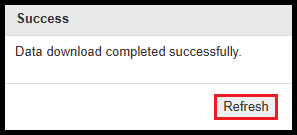
– Click Refresh in the pop-up window that confirms the successful data download.
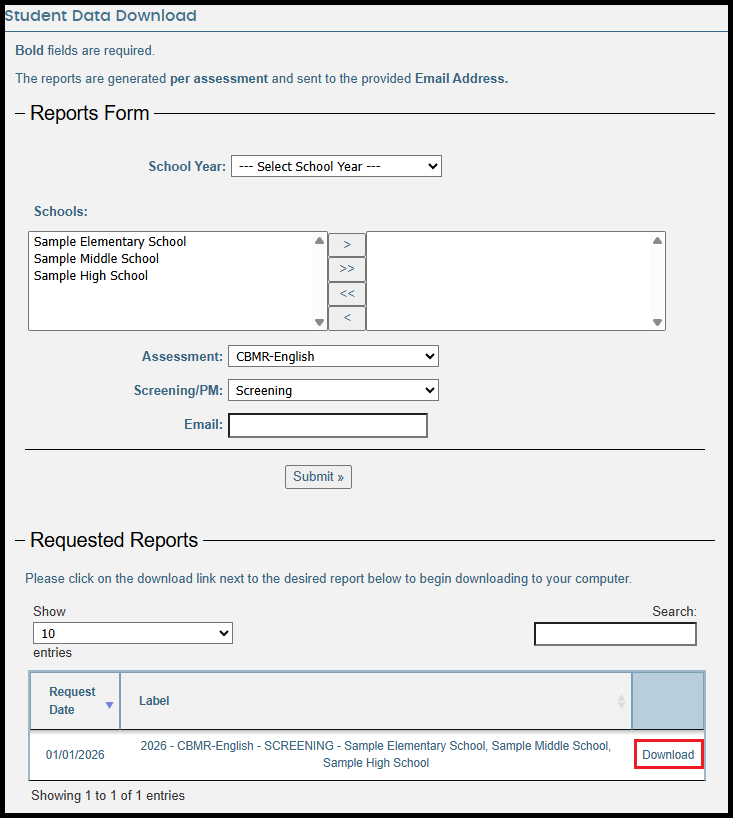
Step 4 – Downloading Requested Reports
– Below the Reports Form, your most recently requested file will be at the top of the Requested Reports list.
– When the file is ready, click Download on the right side of the file row.
Step 5 – Requesting Additional Assessments
– Repeat Step 3 and select a different assessment.
– Repeat Step 4 to download the new report.
– Continue repeating Step 3 and 4 until all assessment reports have been downloaded.
Step 6 – Sending Data to ECRA Group
– Rename each downloaded data file to include the following information before sending to ECRA:
– District name
– School year selected for download
– Send the downloaded data files to ECRA using your district’s secure data transfer folder.